Desktop Audio Guide
A guide to desktop audio capture on MacOS versions prior to 13+ Ventura
In MacOS versions prior to <13 Ventura, Apple did not provide an easy way for software developers to access your desktop audio. As such, SoundSafari cannot automatically visualize desktop audio without some extra setup on MacOS 12 Monterey and earlier.
If you can update your MacOS to the latest version this is the easiest way to get desktop audio support. If you are stuck on MacOS 12 Monterey or earlier, you can still visualize your desktop audio with these steps:
Step 1
Install an app to assist with routing your desktop audio:
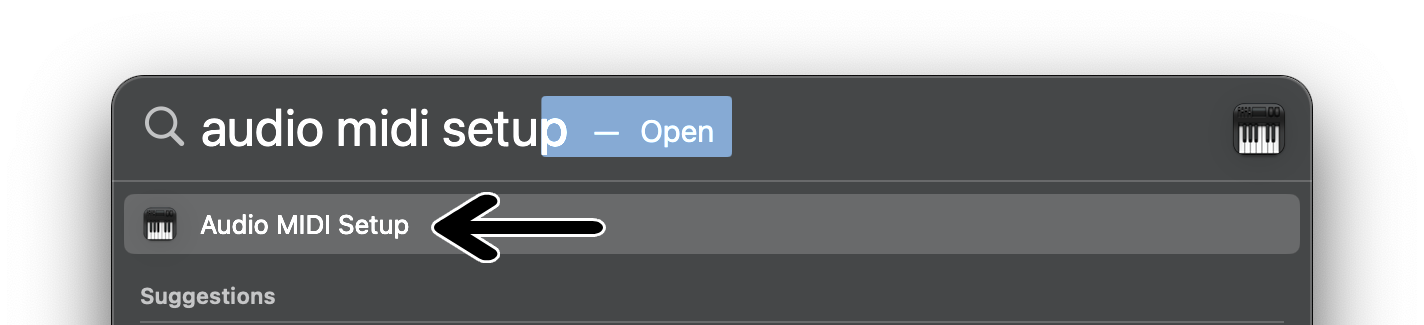
Step 2
Launch Audio MIDI Setup:
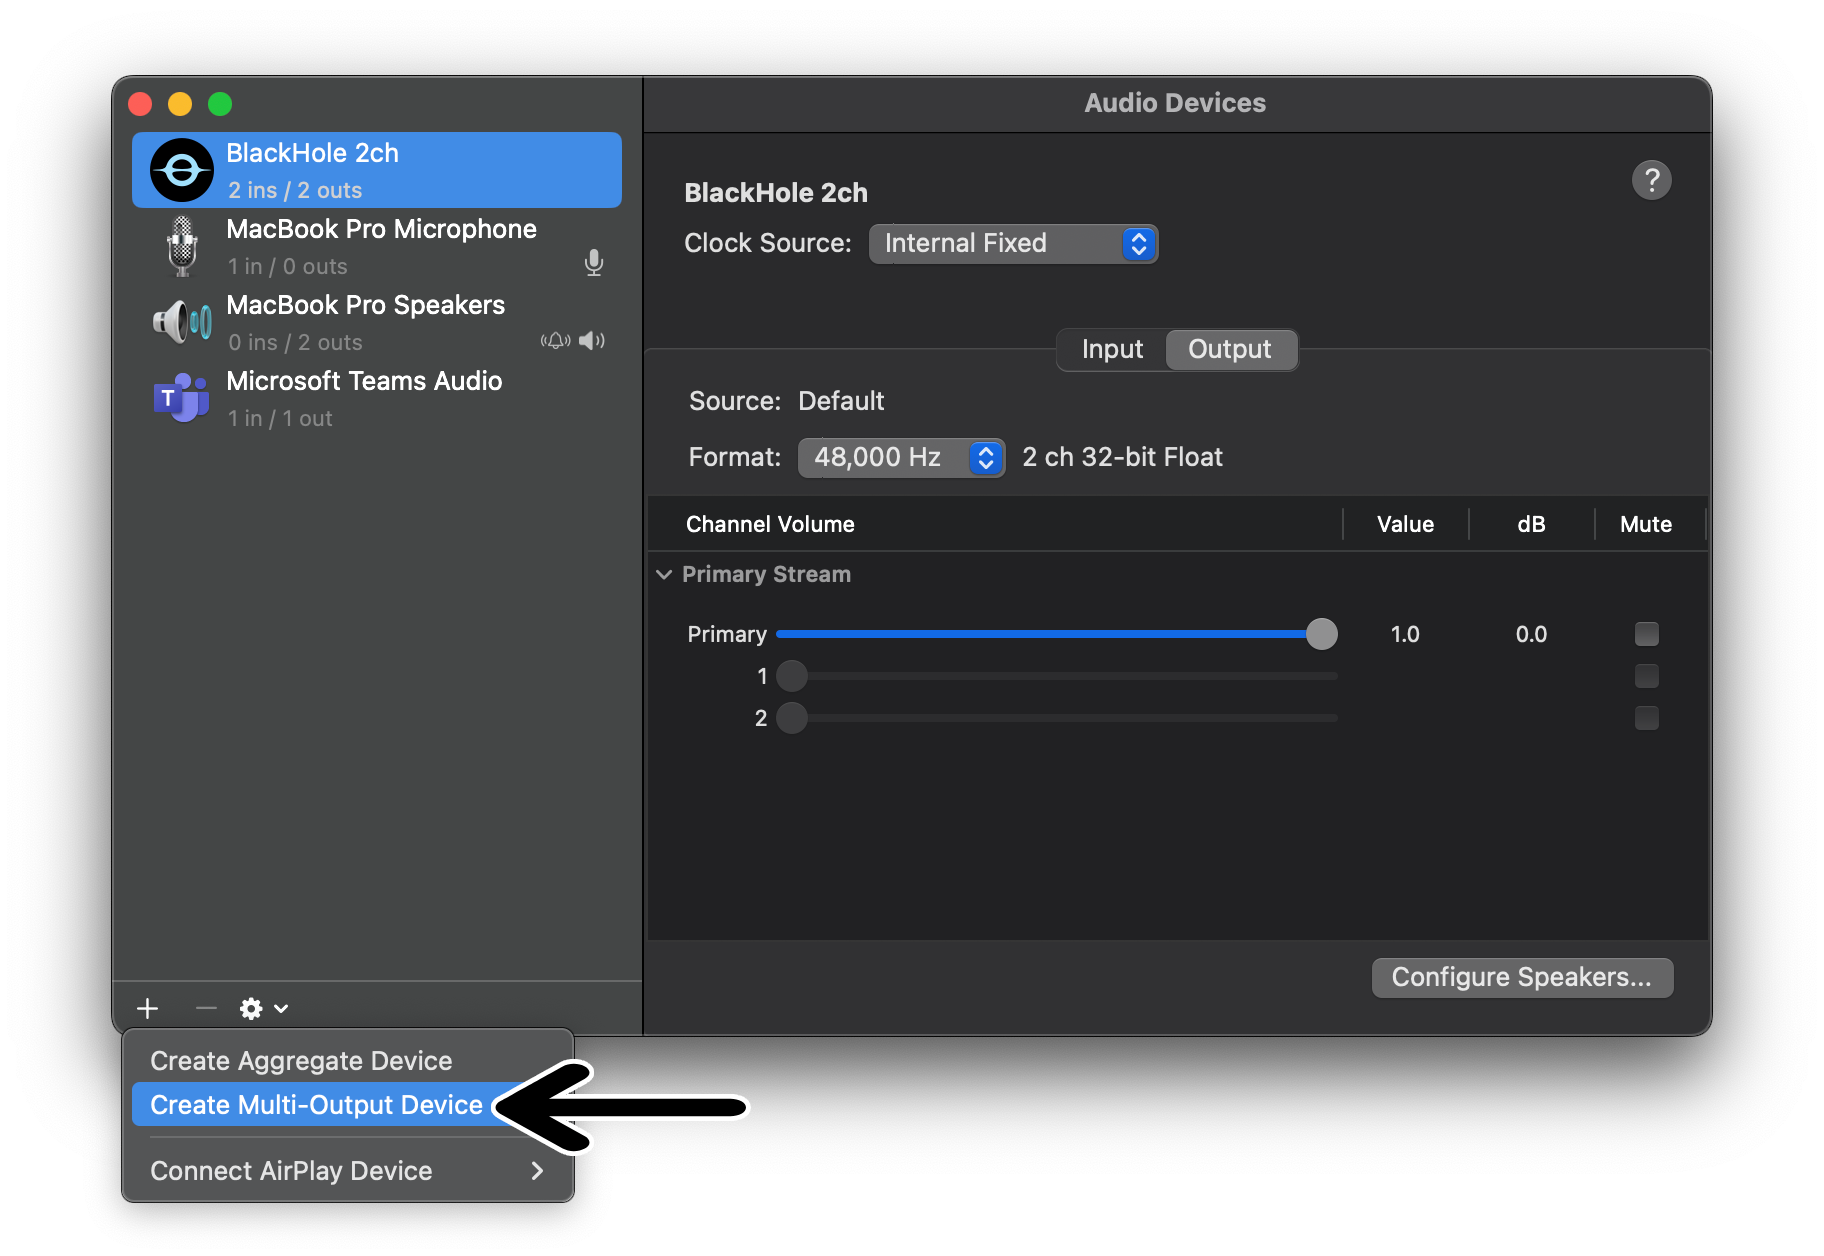
Step 3
In the bottom left corner, click the "Plus" ➕ button and select "Create Multi-Output Device":
Step 4
Give your new device a name (optional but recommended):

Step 5
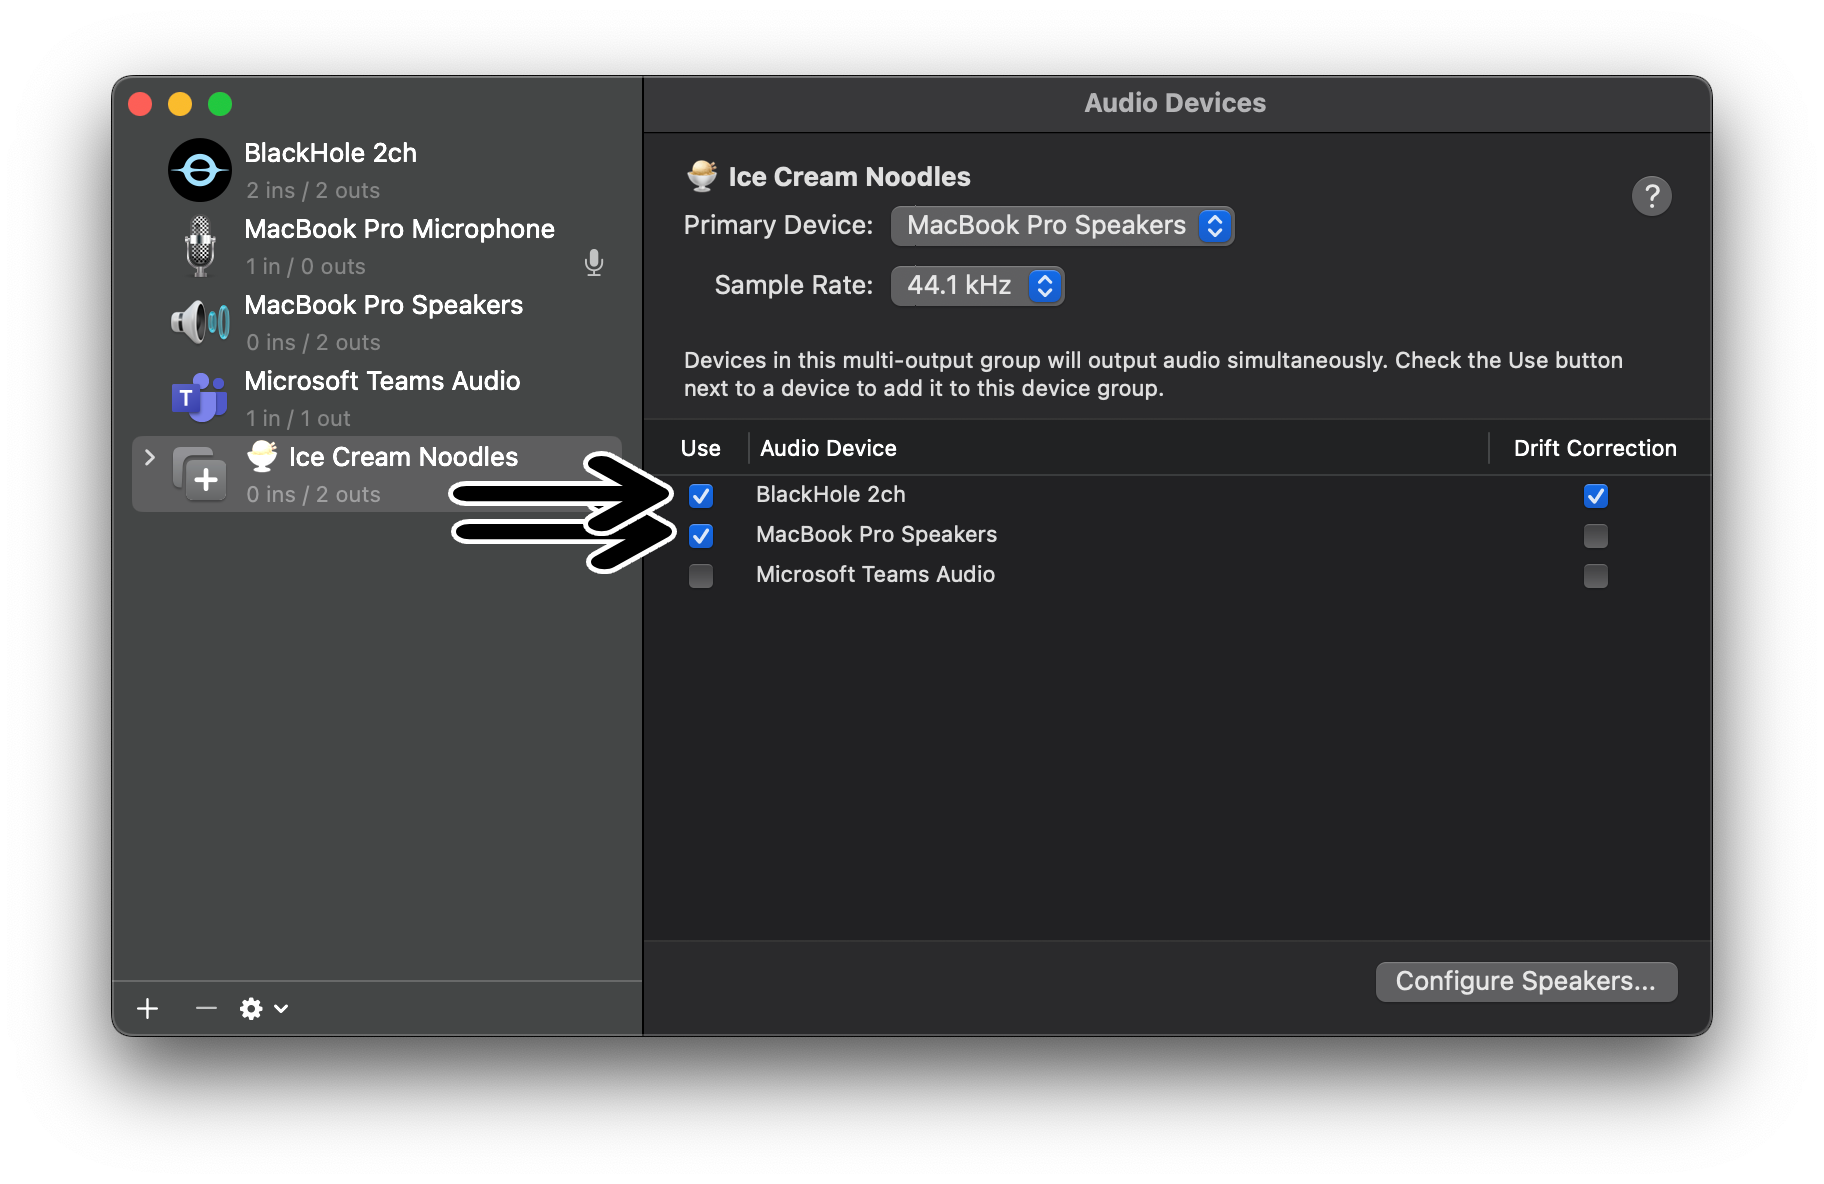
Select both your normal audio output and the virtual output device:
- Your regular speakers (e.g., "MacBook Pro Speakers")
- Your virtual device (e.g., "Blackhole 2ch")
Step 6
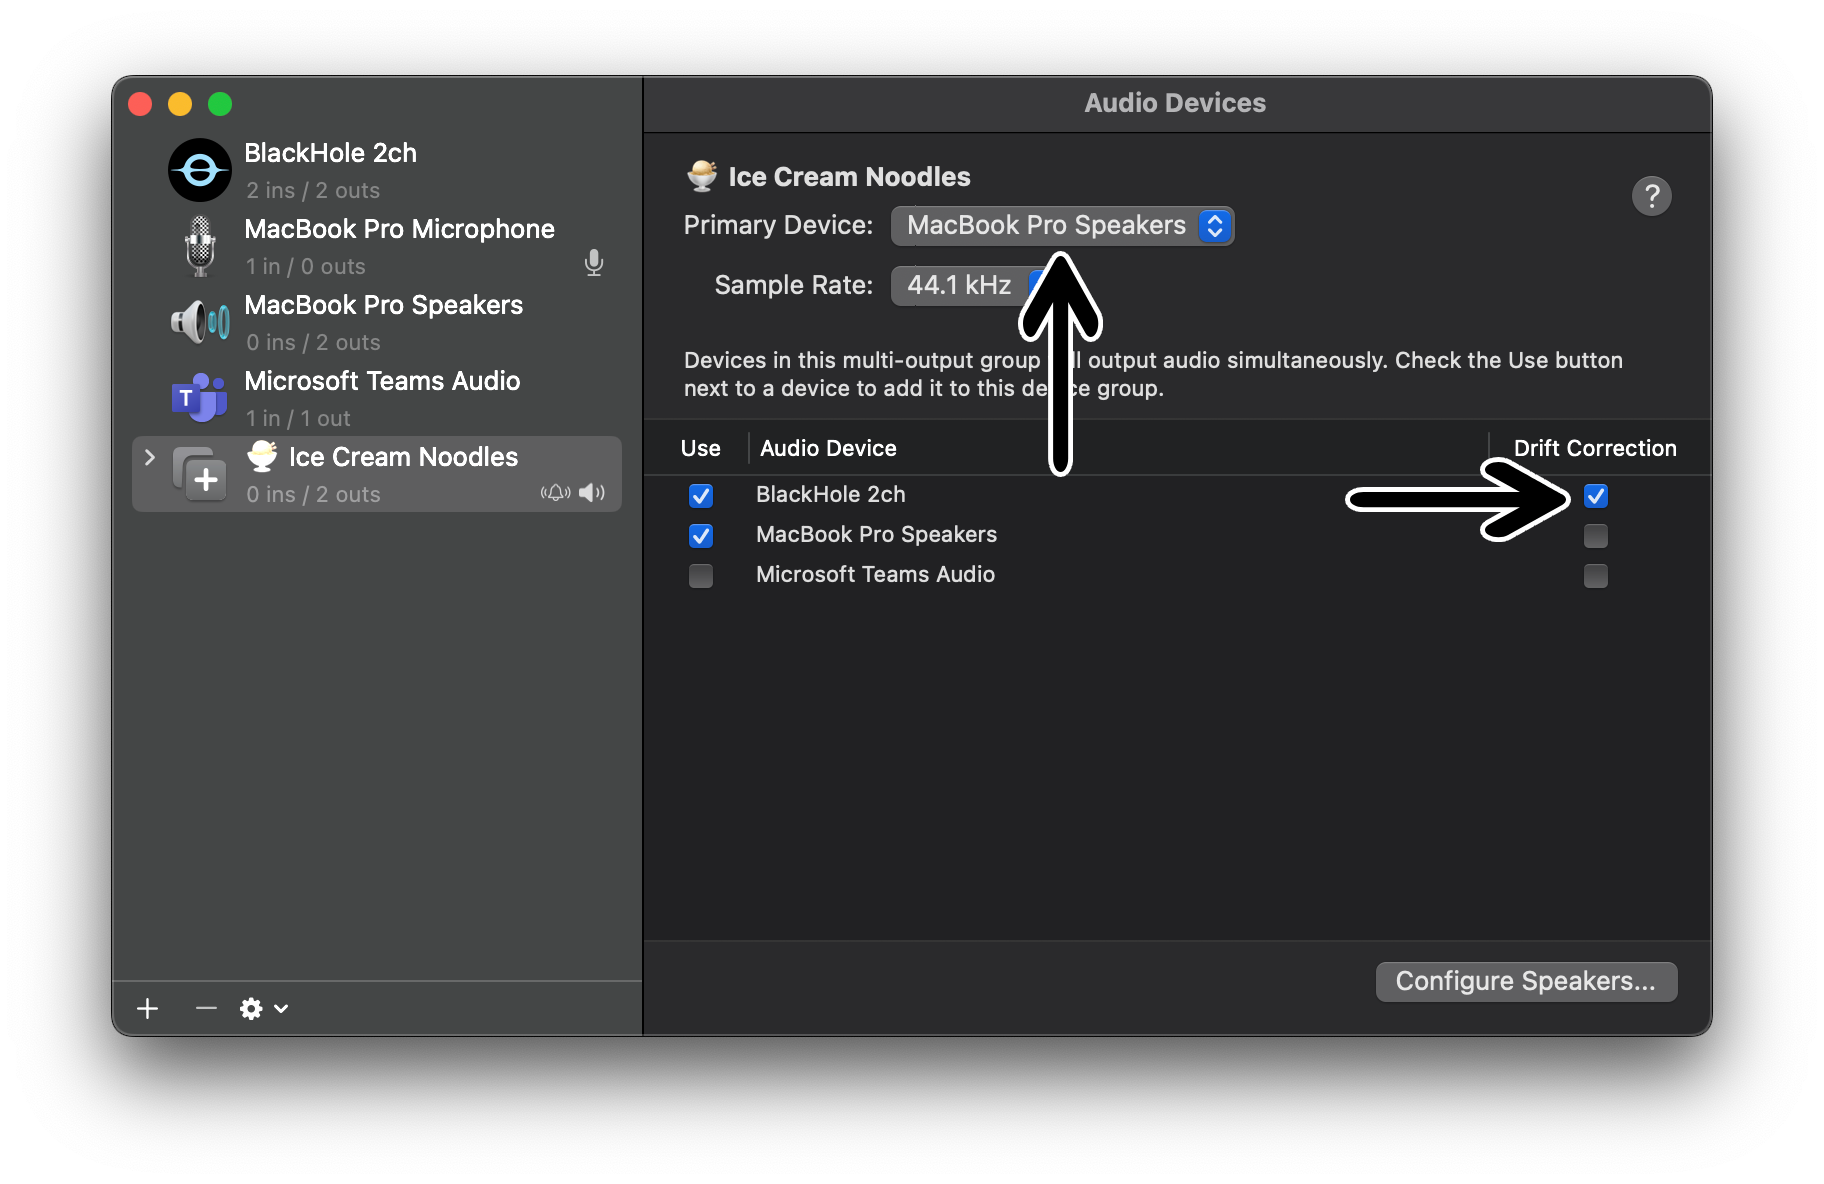
Configure your device settings (recommended):
- Set your normal audio output as the default device
- Enable drift correction for the virtual output device
Step 7
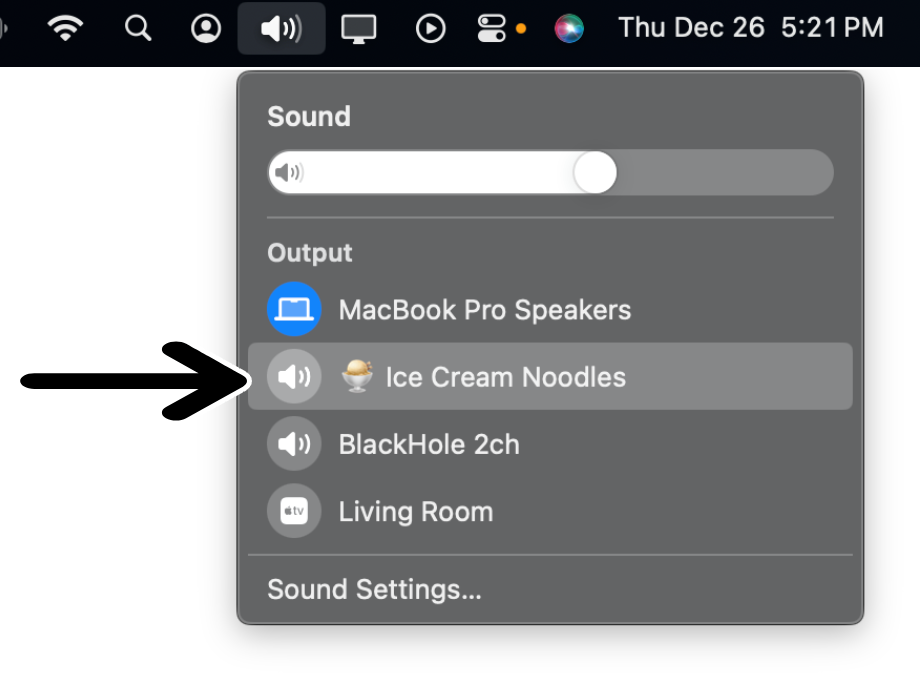
Set your new multi-output device as the system output:
Step 8
Restart SoundSafari to detect your new multi-output device
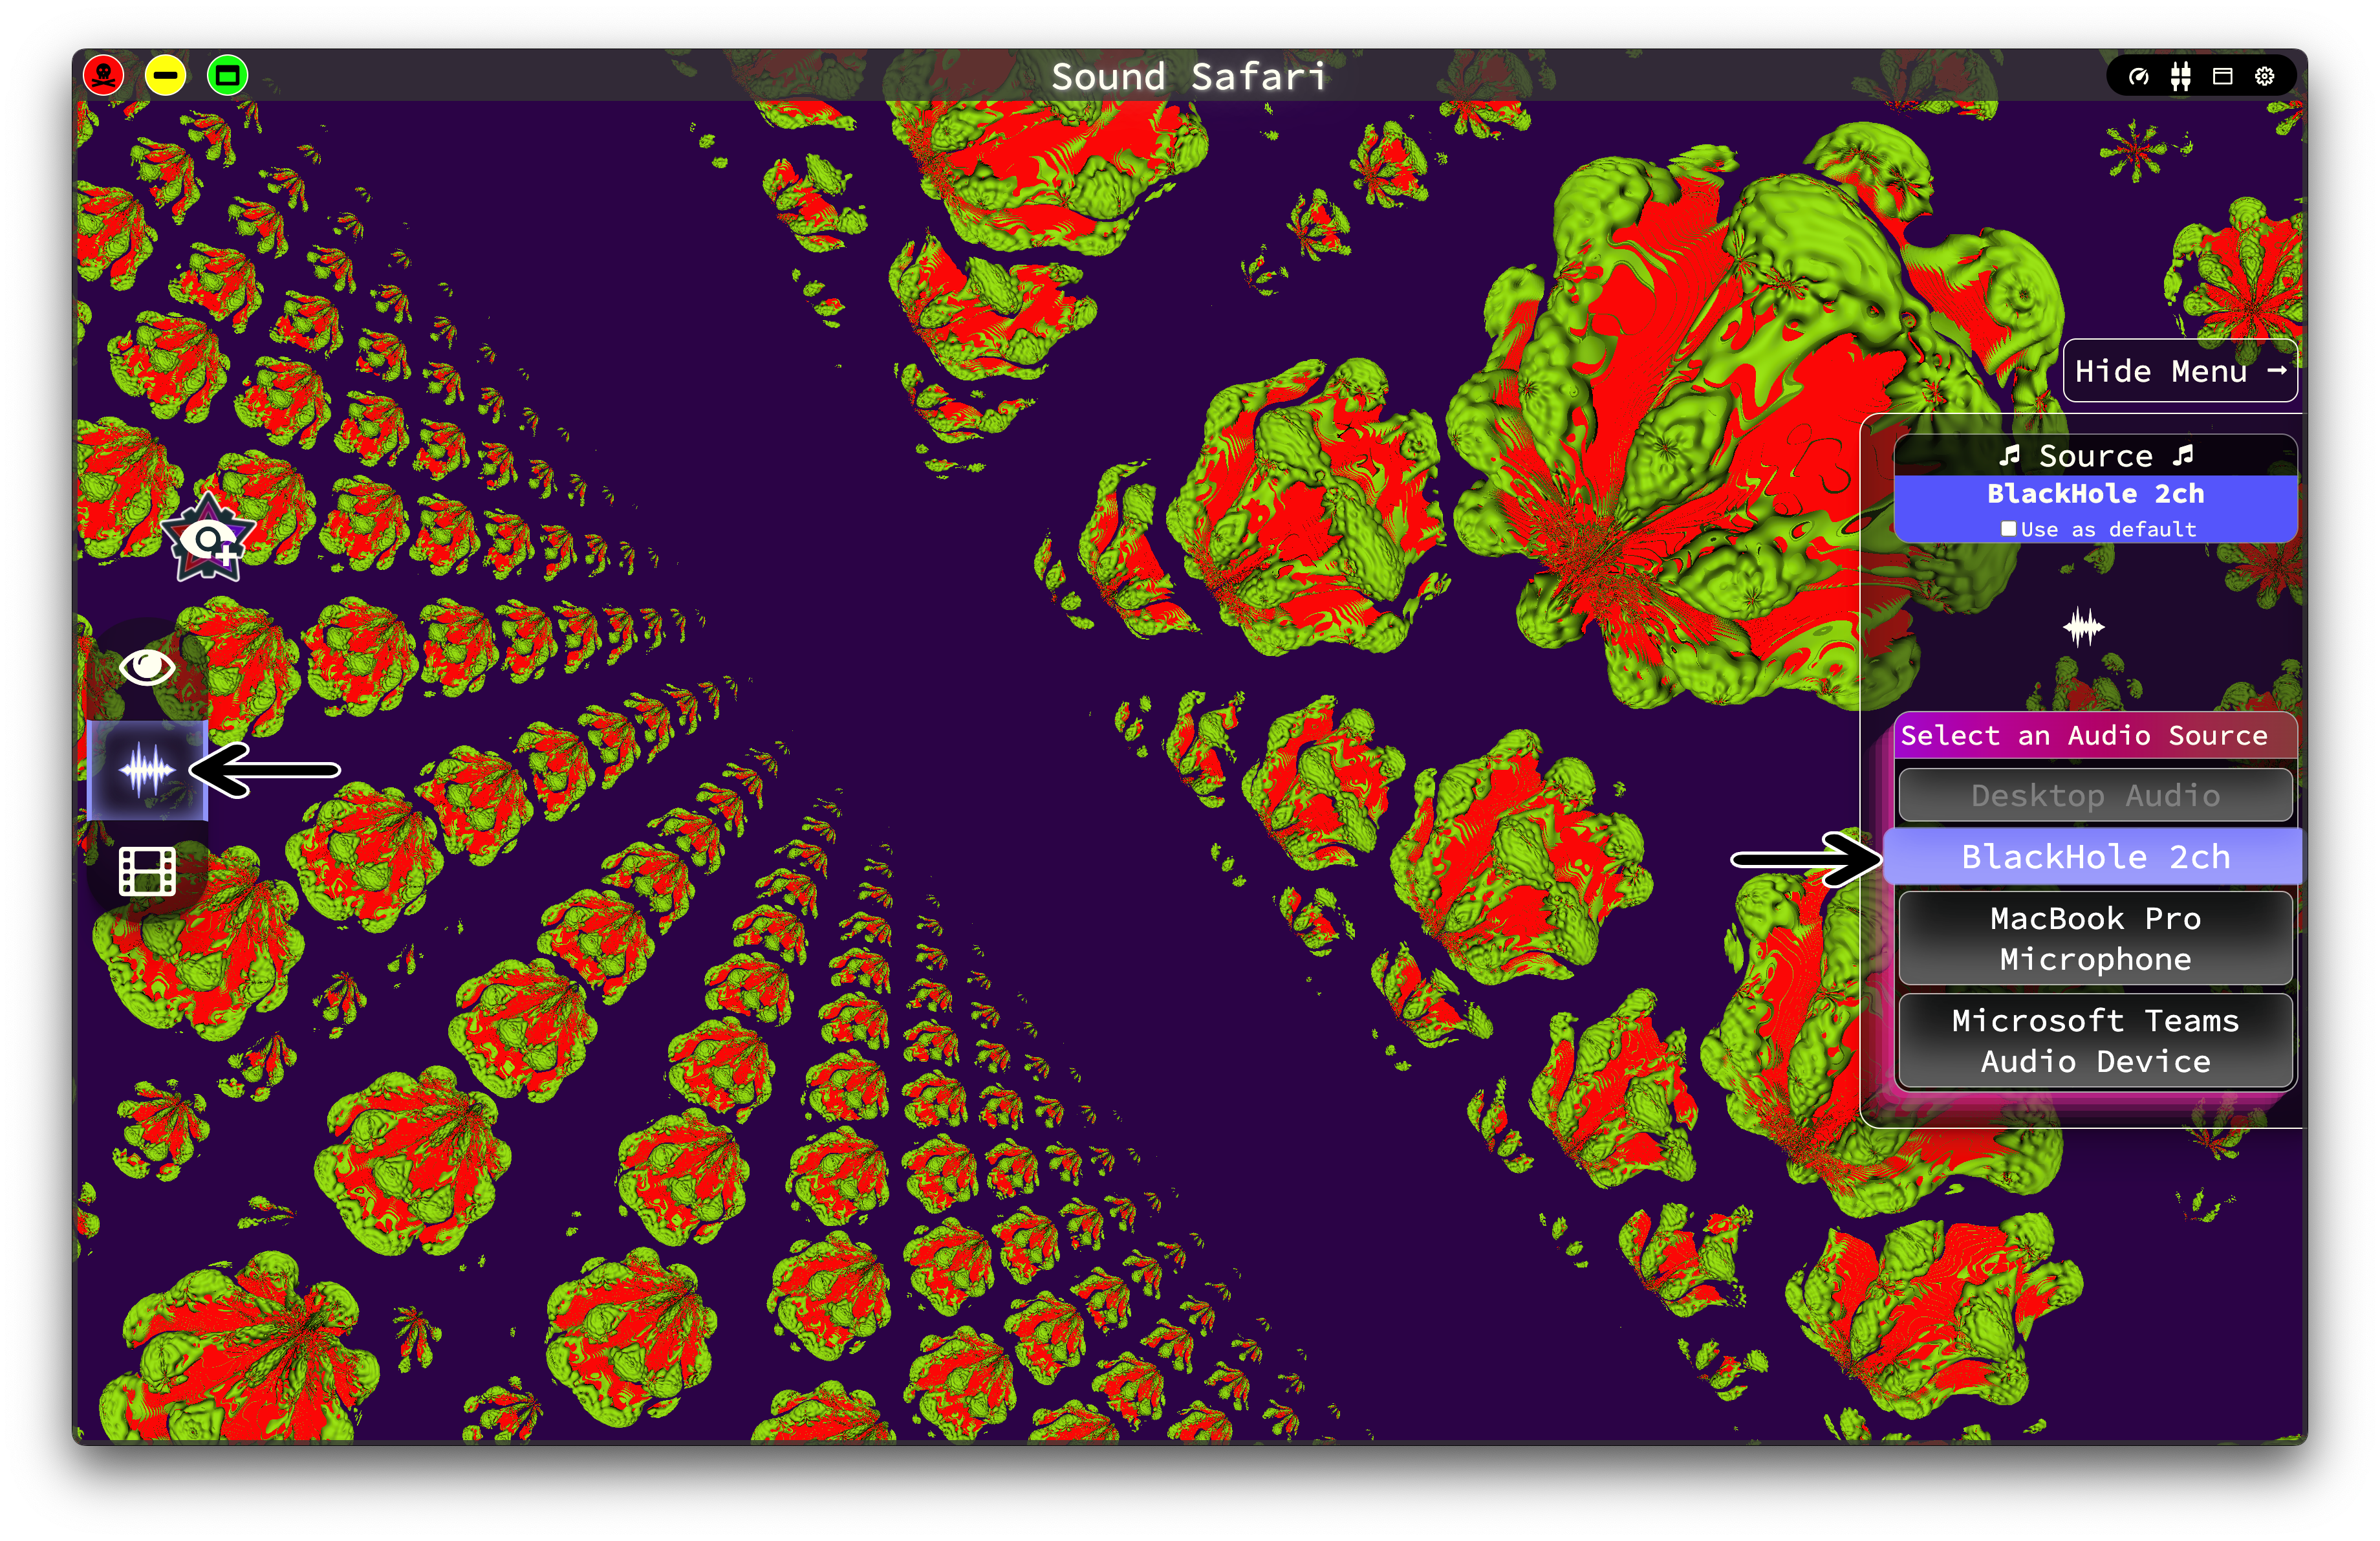
Step 9
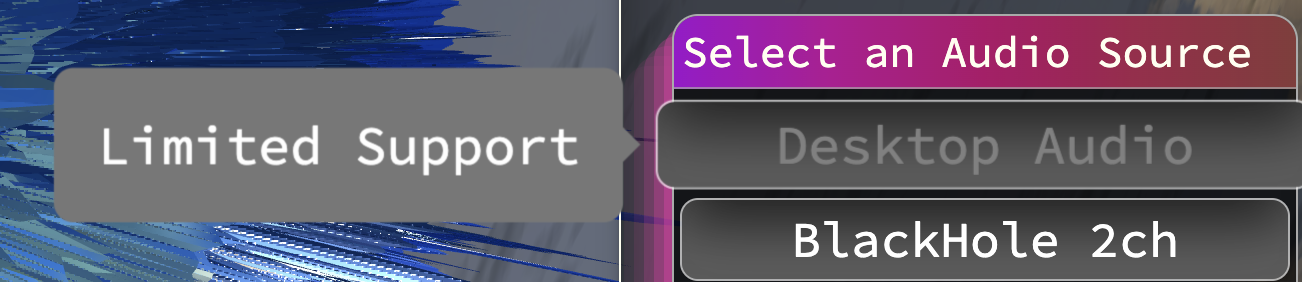
Select your virtual audio device in the SoundSafari source selector (e.g., Blackhole 2ch)